Fast. Simple. Direct. That’s the Tri Star Difference.
We’ve streamlined the process so you can get your powertrain product faster—without unnecessary markups or delays.
Get Started in 3 Easy Steps:
1 – Find Your Product 2 – Review & Select the Best Fit 3 – Submit Your Request — We’ll Handle the Rest
FIND YOUR POWERTRAIN PRODUCT BELOW
Part
Year
Make
Model
Prod Specs
Engine Size
Cyls
drivetrain
Detail
Addl Detail
Part No
category
build
part_no
View Product
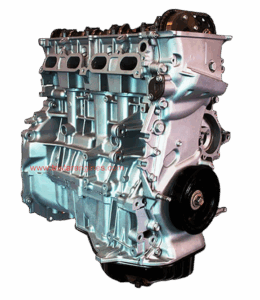
Head
2024
Ford
F-150
V8 5.0 DOHC 32V
5.0 L
Assembled with Valves, Springs & Cams,Dual V.V.T. Type - Phasers Not Included
FORD 5.0 18-24 DOHC L Head
2FTGRL
Replacement
Cylinder Head
2FGRL
Head
2024
Ford
F-150
V8 5.0 DOHC 32V
5.0 L
Assembled with Valves, Springs & Cams,Dual V.V.T. Type - Phasers Not Included
FORD 5.0 18-24 DOHC R Head
2FTGRR
Replacement
Cylinder Head
2FGRR
Head
2024
Ford
Mustang
V8 5.0 DOHC 32V
5.0 L
Assembled with Valves, Springs & Cams,Dual V.V.T. Type - Phasers Not Included
FORD 5.0 18-24 DOHC L Head
2FTGRL
Replacement
Cylinder Head
2FGRL
Head
2024
Ford
Mustang
V8 5.0 DOHC 32V
5.0 L
Assembled with Valves, Springs & Cams,Dual V.V.T. Type - Phasers Not Included
FORD 5.0 18-24 DOHC R Head
2FTGRR
Replacement
Cylinder Head
2FGRR
Head
2024
Ford
Mustang
L4 2.3 DOHC 16V
2.3 L
Assembled with Cams - V.V.T. Phasers Not Included
FORD 2.3 15-22 TURBO HEAD
2FTFL
Replacement
Cylinder Head
2FFL
Head
2024
Dodge
Durango
V8 6.4 OHV 16V
6.4 L
Assembled with Valves & Springs
CHRY 6.4 HEMI 11-22 RH HD
2DTM9R
Replacement
Cylinder Head
2DM9R
Head
2024
Dodge
Durango
V8 6.4 OHV 16V
6.4 L
Assembled with Valves & Springs
Chry 6.4 HEMI 11-22 L Head
2DTM9L
Replacement
Cylinder Head
2DM9L
Head
2024
Dodge
Durango
V8 5.7 OHV 16V
5.7 L
Complete Head with Valves & Springs,2 Spark Plugs per Cylinder
CHRY 5.7 09-22 RIGHT HEAD
2DTM2R
Replacement
Cylinder Head
2DM2R
Head
2024
Jeep
Wrangler
V8 6.4 OHV 16V
6.4 L
Assembled with Valves & Springs
CHRY 6.4 HEMI 11-22 RH HD
2DTM9R
Replacement
Cylinder Head
2DM9R
Head
2024
Jeep
Wrangler
V8 6.4 OHV 16V
6.4 L
Assembled with Valves & Springs
Chry 6.4 HEMI 11-22 L Head
2DTM9L
Replacement
Cylinder Head
2DM9L
Head
2024
Jeep
Grand Cherokee L
V8 5.7 OHV 16V
5.7 L
Complete Head with Valves & Springs,2 Spark Plugs per Cylinder
CHRY 5.7 09-22 RIGHT HEAD
2DTM2R
Replacement
Cylinder Head
2DM2R
Head
2024
Dodge
Durango
V8 5.7 OHV 16V
5.7 L
Complete Head with Valves & Springs,2 Spark Plugs per Cylinder
CHRY 5.7 09-22 LEFT HEAD
2DTM2L
Replacement
Cylinder Head
2DM2L
Head
2024
Jeep
Grand Cherokee L
V8 5.7 OHV 16V
5.7 L
Complete Head with Valves & Springs,2 Spark Plugs per Cylinder
CHRY 5.7 09-22 LEFT HEAD
2DTM2L
Replacement
Cylinder Head
2DM2L
Head
2024
Ram
1500
V6 3.6 DOHC 24V
3.6 L
Assembled with Cams, E.G.R. Hole Smooth,VVT Phasers Not Included
CHRY 3.6 16-24 LFT HEAD
2DTHHL
Replacement
Cylinder Head
2DHHL
Head
2024
Dodge
Durango
V6 3.6 DOHC 24V
3.6 L
Assembled with Cams, E.G.R. Hole Smooth,VVT Phasers Not Included
CHRY 3.6 16-24 LFT HEAD
2DTHHL
Replacement
Cylinder Head
2DHHL
Head
2024
Dodge
Durango
V6 3.6 DOHC 24V
3.6 L
Assembled with Cams, E.G.R. Hole Smooth,VVT Phasers Not Included
CHRY 3.6 16-24 RGT HEAD
2DTHHR
Replacement
Cylinder Head
2DHHR
Head
2024
Chrysler
Grand Caravan
V6 3.6 DOHC 24V
3.6 L
Assembled with Cams, E.G.R. Hole Smooth,VVT Phasers Not Included
CHRY 3.6 16-24 RGT HEAD
2DTHHR
Replacement
Cylinder Head
2DHHR
Head
2024
Chrysler
Grand Caravan
V6 3.6 DOHC 24V
3.6 L
Assembled with Cams, E.G.R. Hole Smooth,VVT Phasers Not Included
CHRY 3.6 16-24 RGT HEAD
2DTHHR
Replacement
Cylinder Head
2DHHR
Head
2024
Chrysler
Grand Caravan
V6 3.6 DOHC 24V
3.6 L
Assembled with Cams, E.G.R. Hole Smooth,VVT Phasers Not Included
CHRY 3.6 16-24 LFT HEAD
2DTHHL
Replacement
Cylinder Head
2DHHL
Head
2024
Chrysler
Grand Caravan
V6 3.6 DOHC 24V
3.6 L
Assembled with Cams, E.G.R. Hole Smooth,VVT Phasers Not Included
CHRY 3.6 16-24 LFT HEAD
2DTHHL
Replacement
Cylinder Head
2DHHL
Head
2024
Jeep
Wrangler
V6 3.6 DOHC 24V
3.6 L
Assembled with Cams, E.G.R. Hole Smooth,VVT Phasers Not Included
CHRY 3.6 16-24 RGT HEAD
2DTHHR
Replacement
Cylinder Head
2DHHR
Head
2024
Chrysler
Voyager
V6 3.6 DOHC 24V
3.6 L
Assembled with Cams, E.G.R. Hole Smooth,VVT Phasers Not Included
CHRY 3.6 16-24 RGT HEAD
2DTHHR
Replacement
Cylinder Head
2DHHR
Head
2024
Chrysler
Pacifica
V6 3.6 DOHC 24V
3.6 L
Assembled with Cams, E.G.R. Hole Smooth,VVT Phasers Not Included
CHRY 3.6 16-24 LFT HEAD
2DTHHL
Replacement
Cylinder Head
2DHHL
Head
2024
Chrysler
Voyager
V6 3.6 DOHC 24V
3.6 L
Assembled with Cams, E.G.R. Hole Smooth,VVT Phasers Not Included
CHRY 3.6 16-24 LFT HEAD
2DTHHL
Replacement
Cylinder Head
2DHHL
Head
2024
Jeep
Wrangler
V6 3.6 DOHC 24V
3.6 L
Assembled with Cams, E.G.R. Hole Smooth,VVT Phasers Not Included
CHRY 3.6 16-24 LFT HEAD
2DTHHL
Replacement
Cylinder Head
2DHHL
Part
Year
Make
Model
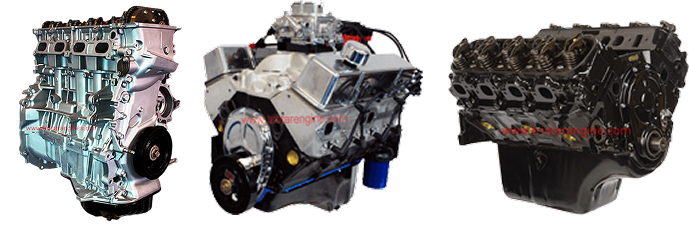
why choose tri star engines?
OE-Quality Remanufactured Parts:
Our products are carefully remanufactured to meet or exceed OEM (Original Equipment Manufacturer) standards. Each powertrain product undergoes a thorough inspection and testing process to ensure it performs at its best.
Wide Selection of Products:
From domestic and foreign cars to trucks, SUVs, and even commercial vehicles, we have a vast inventory to cover all your needs. No matter the make or model, Tri Star Engines is your one-stop shop for quality powertrain products.
Exceptional Customer Service:
Our team is committed to providing top-notch service to ensure your experience is as smooth as possible. We offer expert advice, and technical support to guide you through every step of your powertrain purchase.
Fast Shipping & Easy Returns:
We know how important it is to get your vehicle back on the road quickly. That’s why we provide fast shipping on all orders, with easy return options if necessary.
Tri Star Engines and Transmissions
BBB Accredited Business A Rated By BBB
providing you with the best value available
Since 1988, Tri Star has been America's trusted supplier of OE replacement engines, marine replacement engines and crate engines. We also offer a complete line of high quality transmissions, transfer cases and differentials. Our extensive product line provides you with the highest quality products at the best price, all backed by industry leading warranties.